Friday, June 28, 2013

Bridal Bug Out Bag

So I'm sure you've all heard of the "Bug Out Bag," a sack full of all the things you would need if...the zombie apocalypse happened or the government fell apart or there was a nuke that went off or any other manner of end-of-the-world type events should occur. However, I decided to take this and put my own spin on it for bestie's wedding. Introducing THE BRIDAL BUG OUT BAG! It has everything in it that you could POSSIBLY need in case of wedding disaster. Or not disaster...just...in case.

Let me start by saying that almost everything purchased CAME FROM THE DOLLAR TREE! If it did not come for the dollar tree it came from the bargain bins at Michaels or Walgreens. Seriously, shop sales people.

So that sign is left over from the bridal shower, the little hamper (in spring green one of her colors) came from dollar tree, and the little baggy came from the bargain bin at Michael's...it was also $1.

Makeup remover cloths. We all make "oops"es. Best have something to fix that with.

Microfiber towel: lint free & great for just about anything. & Two packs of tissues.

Baby Powder. YOU NEED THIS SHIT. You might as well cover every part of your body that is covered by clothing in it (especially since her wedding is the end of June. It's HOT people.)

Lint Roller! Because all that dog and cat hair loves to stick to you when you're about to have pictures taken.

Stain remover pen. Again, we all make the "oops"es

Nipple Covers! Oh you mean you can't wear a bra with that? NO PROBLEM.

Box cutter! Because you never know what might need a knife

Micro toothbrush with toothpaste already on it. Freshen that breath and make your teeth look better before you have to smile so hard your face hurts.

Alternate lint brush. Sometimes the sticky kind JUST DOESN'T WORK. 

Q-tips, cotton balls, cotton sheets. Because any of those might be necessary in the application or removal of makeup.

Scissors. You know you need them.

Safety pins! Because you never know when something decides to break. It's the duct tape of clothing repair.

Ivy Green Nail Polish. This is specific to my bride. She's doing an all ivy theme, and I know she wanted to get ivy stenciled on her nails. So...I thought I'd give her this with its thin brush to do the detail work.

Wet ones. Because who knows what germy things might need to be cleaned (Walmart $1 bin)

Tea lights & Matches. You can get a set of tea lights (about 5) and 24 boxes of matches at the dollar tree. I still have these matches left from the LAST bride I made a bridal emergency kit for. It just helps to kind of chill out and relax you while you're getting ready.

Mini-Mani Kit & Cute Nail Files. These are actually REALLY good kits, and again, $1, dollar tree.

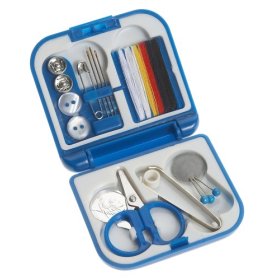
Mini sewing kit. $1.50 at Michaels in the bargain bins. Sometimes they have them for $1-$2 at kroger or dollar tree or michaels.


Bobby Pins! These are a girl's best friend. They were 2 for $4 (I remember when they used to be 2 for $1. Now that's CHEAP to get them 2 packs for $4... -_-). I got both packs so that we'd have a wide array of colors for everyone's hair.


Double sided "fashion tape." Basically it keeps your dress from falling, lol.


And last, but not least, I bought 4 water bottles and two packs of glitter letters. The 4 bottles were $1 each at Dollar Tree. The letters were $4.99 / pack (but they were like 120 letters/numbers per pack. I just wanted to make sure I had enough of all the RIGHT letters. And I did open and use both packs but it was more for consistency and cuteness than actually running out of anything. And, I have all the others to use in the future. They were self-adhesive and hard to get off. As long as you didn't dishwasher these bottles (handwash should be fine) they should stay on for a good long while. But at the very least, for the day of. Because you don't want to spill on dresses! So something with a lid is necessary!)


For some reason I don't have the Bride one for the Vertical side, but it says "Bride" in pretty script letters. It doesn't have her name. Not sure why I decided to do that, lol. 


But there you go! A bridal bugout bag! Take my ideas or add in some of your own special to your bride. I promise she will appreciate the sentiment. 

DIY Gel Nails

For Bestie's Bachelorette party a few weeks ago I got my nails done for the first time with "gel polish." If you don't know what gel polish is it's kind of like....what they put over your actual nail if you get tips put on. So it was kind of like getting false nails / tips except that it was all YOUR nail: so no awkward can't use your hands or fingers, no painful breaking or tearing off, and nothing except your real nails.

Sounds awesome right?

Well, I had a pleasant experience with it. It was thick and strong and lasted the full two weeks (to the day) they promised. It began to chip at that point, and I peeled them off (not the smartest idea). You're supposed to soak them off....either in pure acetone or a special "gel soakoff solution". Mine were loose enough at that point that it didn't do THAT much damage to my actual nail, though. The french didn't even chip on mine.

Bestie: not a great experience. Her nail tech wasn't as skilled (and also just didn't give a crap about doing a good job). Hers were chipping by the end of the day, and after a week of having them she hated them and started ripping her own nails to shreds trying to get them off. But she bought some pure acetone and finished getting them off with only minimal harm done. She's pregnant and already has strong nails so she has SUPER NAILS right now.

Downside to these: They're $25-$35 just for the gel part. That's not a manicure and the gel. That's JUST the gel. They're about the price of getting fake nails put on...because it's time consuming. HOWEVER, several nail supply brands: Sally Hanson, Gellish, Sephora, OPI, SensatioNail, Kiss...I can't speak to all of them. I haven't used them all.

There's a pretty good review on three of the "drug store" brands (Sally Hansen, SensatioNail, and Kiss) here: Gel Nail Review


The kit I chose was the SensatioNail because it came with a large UV light, enough color for 12 polish changes, and all of the liquids they use at the salon: gel prep, top/base coat, clear color coat, color coat, and remover.

Now you may think: I already own a base/top coat and color and remover. What's the point?
These are all SPECIFICALLY for use with gel and uv lighting. They are much different than your typical versions of this. If you don't follow the steps correctly then your nails won't turn out. But, it's all the same steps they take at a salon so I thought it was worth the investment at $49.99

I also bought an add on set for french because I really wanted french for bestie's wedding this weekend: $12.95 additionally.


You get a little pamphlet inside that tells you the steps, but basically they are as follows:

Rough your nails up with the file (the way you start any good manicure)
Wipe them off with a little dab of the acetone/remover on the lint free pads
Apply gel primer to one hand
Cure for 30 seconds (it will beep when 30 seconds is up)
Apply gel primer to other hand
Cure for 30 seconds
Apply base/top coat to one hand
Cure for 30 seconds
Other hand
Cure for 30 seconds
"Rim" the nails with base/top coat (basically make sure the tips are covered well)
Cure for 30 seconds

Now, here is where there will be a difference between a color coat and a french coat. For a color coat you would:
apply the color coat
cure for 60 seconds (that's the length the light stays on)
other hand
then rub over with acetone on a lint free wipe over each finger (that helps seal it)
cure for 30 seconds on each hand


For french:
(you have two options)

1. clear coat COLOR polish (it's clear but it's labeled as clear coat color. that's important, not the base/top coat).
cure 60 seconds (each hand)
Hand paint your tips with white color polish using either the cuticle pusher or any nail brushes you might have and the gel remover to fix mistakes.
Cure for 60 seconds (each hand)
Go over each nail with lint free wipe with acetone/remover
Cure 30 seconds (each hand)


2. Clear Coat Color Polish
Cure 60 seconds
Use the white nail tip "strips"

If you've used strip nails / nail "stickers" / premade french tips before you'll know the drill:
Find the right size for your nail (you can see them in the picture above)
Peel off the top layer of plastic
Press the strip to the nail at the desired height for "french tip" effect
Press it down hard enough that it sticks to your nail and comes off the plastic
File in a downward motion around the tip of the nail to remove the excess polish
--you may also have to "peel" some of it away. just make sure you've made a good indention around your nail so that the polish on your nail versus the polish hanging off are sort of like a perforated line.
If you need to shape or secure the edges use the flat part of the cuticle pusher to secure it.
Cure for 60 seconds
Use wipe with acetone to go over each nail
Cure for 30 seconds


Now it should be noted that the reason you use the wipe is to "seal" it. It's not to "erase" anything. If you need to "erase" then you'll need far more acetone/remover than you should be using to seal the nails. I'd suggest ebaying some professional nail brushes if you're going to spend much time doing french nails simply because they make the "erasing" easier. I got a whole set online, ebay, $3.50, free shipping.

Now back to the final steps you do FOR EITHER:

Apply base/top coat
Cure 60 seconds
Other hand same deal
Rim the nails again
30 second cure each hand
Use lint wipe with acetone over each nail
Cure 30 seconds


As you can see it turned out pretty well. I'm on day three and the ends are chipping just a bit, but I don't think I rimmed them as well after the tips were on. I'm going to do some white touchups and tell you how that goes. All in all though I would give SensatioNails at home gel manicure kit:
Difficulty: B (there are a lot of steps, but they're not THAT hard)
Time: About an hour
Price: B +  (It's a steep one to start with, but when you look at what you get the value is great)
Overall: A- (I really feel like they do what they say they do, and once you've bought the kit -- about the cost of 1.5 gel manicures in a salon-- you get approximately 12 of them. There is a bit of a learning curve, but on my first go round -- which took an hour and a half but i'm quite sure I could cut it down to an hour or less next time -- I still got a pretty good result.)

Monday, June 10, 2013

Presents

Here comes the majority of my cost:
Presents


We will start with the Bulletin Board:

Frame: Goodwill $3
Fabric: $0 (I tore up an old dress in her color)

Ribbon: $1 (bargain bin at Michaels)


"Frames": Scrapbook paper $1.50 total


Bride & Groom signs: free!
http://static.weddingchicks.com/freebies/wedding-signs-labels/custom-bride-and-groom-signs/

Pictures: $20 (99 cent prints at Walgreens)

Spare Invitation

Puzzle Piece printout of them: Free!
http://bighugelabs.com/jigsaw.php

Bow Stickers on photos: $1 (for 24, bargain bin of Michaels)


Push pins ( had around)
Hot Glue


Wedding-themed stickers: $1.50 (Michaels)

I just cut out the pictures how I wanted and put the "frames" around them. Some I added ribbon like ornaments. Some I added bow stickers or other stickers.

Then, I wrapped the fabric around a piece of cardboard cut to fit the frame and hot glued it.
Then I fixed the fabric covered cardboard back into the frame itself

That's the back. You can see the wire it's supposed to hang from. 

Then I attached the pictures to it:


Board Total: $28


Basket 'O Goodies


Custom "Mrs. Johnson" hanger from Etsy. $9.99 hanger, $10 shipping.
https://www.etsy.com/shop/PASSIONandLOVE


Silicone Baking Tray $2 Oriental Trading Co
Foldable Cutting Board (in basket) set of 3 I got for Christmas. Never used that one.


Boston Terrier Wrapping Paper $1 Clearance at Target


Picture Frame & Picture in it: $1.00


Thank you notes:
Michael's Bargain Bin
$1 / pack of 8 (3)
And leftover thank you notes (plain) from my high school graduation.


"Ornaments" that didn't fit on the photo board

Resin Rose Earrings in her colors. Handmade by me. 2 packs of resin roses: $.50 each
Clearance at Michaels


Wine Glasses (4)
They cost nothing because I had a set of 16


Cherry Shirt, Walmart, $1.50


Basket (already listed) $1.91
There were wicker loops on the top that I put ribbon through and tied a new bow with a button to secure the front wicker handle. 

Then I took three even pieces of wired ribbon (about 1.5 ft each) and braided them. I then hot glued the ends to curl around and make a loop. Then I took heavy stress beading floss (also had lying around, I make jewelry) and wove it in and out of the wicker and tied it off. Tada! New handles!


Entire Basket: (approx) $30