Saturday, December 6, 2014

Sorry. I've been away.


Im Sorry, I fell off the face of the earth. I'm going to try to get back to trying out things and reviewing again. 

I've been a little busy

I now work full time for myself
Http://marlipaigefloral.com
I do wedding and event flowers and planning. I also do non-event flowers, but to date it's been weddings and a corporate event. 

Speaking of weddings...I HAD MINE!


And of course (crazily) did my own flowers. 


Photos courtesy of my photographer, julie Adams of Adamson Photography (http://julieanddavidphoto.com ) and bob Schlag, personal friend, and owner of a bright arrow Photography. 


I will make individual posts about some of the process of the wedding. As well as start back on non-wedding posts as well. 

Love
MarliPaige


Christmas Cards

I'm So, it's the most wonderful time of the year again, and that means CHRISTMAS CARDS! My husband is not as enthusiastic as I am. Apparently he had to hand sign them every year, and his mom sent out quite a few. He was ambivalent when I told him he didn't have to sign, just have his photo on the card. 

Nonetheless and not withstanding, Christmas cards are some of my FAVORITE things! Whether they're store bought, hand made, digitally made, whatever. I love them!

So I looked all over the net for Christmas card deals. They abound, so, no worries if your aren't made yet. The card I wanted was at http://shutterfly.com and I made them during a promotion where I got 25% off my purchase and expedited shipping for the cost of the lowest level ($14.99). Expedited was "guaranteed" by 12/10, but they came 12/5, just two days after I ordered. I was really pleased. 

So, if you're looking for quality cards and a helpful interface, I recommend them highly. I also just used them for my wedding book. So, they are on my praise list at the moment. 

Here's just a cell phone snapshot of how ours turned out. 


Trust me when I say these iphone pics don't do It any justice. They're amazing quality in person. Plus, I love the adorable pun. "Having ourselves a MARRIED little Christmas." Adorable. 


On a less happy note, I've seen floating around the net stories of a six year old girl, dying of cancer, who is asking for Christmas cards for her last Christmas. I can't imagine the heartbreak she and her family are going through, But I can share the story and her address. Because te outpouring of love trough these cards...may be just what she and her family need to have some peace this Christmas.


Saturday, August 9, 2014

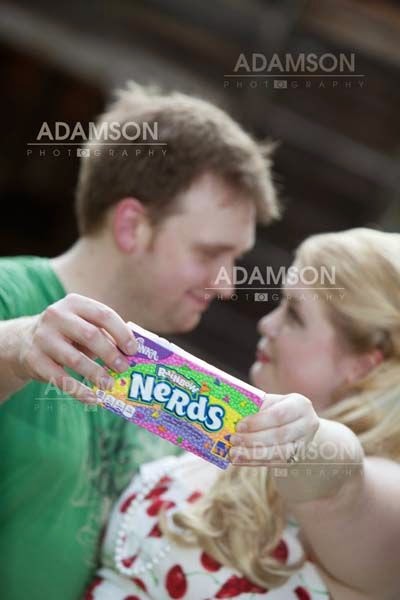
Engagement Photos

All credit for photos goes to Julie and David Adamson of Adamson Photography. If you live in the greater Atlanta area and are looking for a quality wedding photographer, I highly recommend them.

"family" photos (with Bailey)


Soulmates


Nerds

Lovey


Silly


Wednesday, September 25, 2013

Italia at Home [Inspired by Gordon Ramsey]


 So lately I've been on a cooking kick. And because of this I have successfully devoured the 10 seasons of Hell's Kitchen I previous had not seen ( I watched 11 as it aired this year), and I also watched all of MasterChef this year. The one thing that Gordon seems to spend more time yelling about than anything else is Risotto.


Seriously, the man screams about it constantly. And I thought to myself "well, if he's so hell bent on everybody knowing how to make the shit, I will learn!"

Having NEVER attempted risotto in my life, and having only the brief knowledge of what I'd watched people cook on tv (and a glance at a few online recipes) I embarked on my risotto quest.

With this image firmly implanted in my mind:
I began


Mushroom Risotto with Caprese Salad


What you need:
Basmati Rice
Stock (chicken, vegetable, whatever)
Butter
Olive Oil
Mushrooms
Onions
Scallions
White Wine
Garlic
Salt


So I started with two pans the first with Basmati Rice (washed) and two ladles worth of vegetable stock. I then proceeded to add another ladle every time it didn't look 'wet' anymore while stirring.

In the other pan I sautéed olive oil, minced garlic, chopped onions, and scallions until they were caramelized.

I then put them in a separate container to the side.
In that same pan I then added 1/2 stick of butter, mushrooms (chopped) and sautéed
After they were cooked I then threw the onion/garlic/scallion mix back into the pan and stirred. I then topped it off with half a cup of white wine.

By this time my risotto finally looked fluffy (and didn't taste crunchy) 

I poured the contents of one pan into the other.
Stirred.
Vwallah!


It turned out PRETTY DAMN GOOD. I was proud.


Yes chef!


To die for tomato soup

So I've been very domestic lately with my new found lover boy. I've had the urge to cook and clean constantly and once again experiment with food.

So, not feeling 100% I wanted tomato soup. However, I'd rather die than eat that tomato paste in a can Campbell's crap filled with preservatives.


Here's what you need:
A dozen ripe tomatoes
Basil (fresh)
4 oz Cream Cheese (half package)
2 Tbs olive oil
1 large onion
2 cups (1/2 box) of vegetable stock (could also use chicken or beef)
1.5 Tbs minced garlic
Salt & Pepper to taste


Ok, easy peasy.

Get a big soup pot and put the stock in. Put on high while you chop tomatoes. I just diced mine.
Throw tomatoes into the broth
When they're both boiling turn down to medium
Put lid on

In a separate pan:
put olive oil in pan and let heat
chop large onion and add to pan with garlic
Reduce to medium and stir vigorously.

Once you start to get some color on your onions add about 2 leaves of finely chopped basil.
Reduce to med-low heat.

Let that cook down. (this takes maybe 2 minutes. Don't do it long enough to let anything burn)

Add the 1/2 package, 4 oz of cream cheese (can use full fat, 1/3 less fat, whatever) cubed or softened.

Stir and cook until thoroughly mixed.
Remove from heat.
Pour in tomato/broth mixture.
Stir until mixed.

I then gave two cranks on my salt mill
Then one on my pepper mill (i'm not a huge pepper person)
Put the top back on and set it between medium and medium low.
Cook for 45 minutes.

Should smell like tomato soup when you take it off. Everything should look like (slightly chunky) tomato soup. If it doesn't, put the lid back on and give it a few more minutes. Feel free to crank up the heat a little at the end if you need to. But make sure to stir if you do.

Finally, remove from heat. Take handheld blender (like the old-timey milkshake blenders) and blend the chunks of tomato until smooth.

I made crescents with fresh mozzarella inside because who wants tomato soup without a grilled cheese?

Tuesday, September 17, 2013

An Old Fashioned Baby Shower [Card]

Keeping with my Bestie's love of all things vintage and shabby chic (and because I found these great planters at Goodwill, her mom and I have decided to throw her a vintage baby shower.

I'll put pictures up of everything as it comes together, but first and foremost, I am so proud of my two vintage cards that I changed to make look like her and her husband. I'll show the original and my edits.

If you're wondering how I did it...two softwares: GIMP and FotoFlexer. GIMP is an online, free to download photoshop-light that allows you to add layers. And FotoFlexer is an online free to use editing software that I've been using for years.

The Original Card


Beautiful, touching, but she does NOT have black hair

So Gimp:
Use the lasso tool to select the area you want to recolor
Go to: Layer: Add new layer
Pick the color that you want to recolor it 
Use the fill bucket
In most cases you then go to the layer menu and select mode from "normal" to "overlay." HOWEVER, if your color is lighter than the original, that doesn't work.
So I chose mode as "lighten only"


Looks a little unnatural. But not TOO bad.
I then went back to "layer" and merged down the layers together and saved it / exported it.

The I went to fotoflexer.com
I uploaded the image
I selected the "effects" tab
Then "tint" and chose a light pink color to tint the entire image.


It took away the starkness of the orange hair, and it gave it a beautiful vintage feel. 


Second card:

She and her hubby both have red hair. His is more blonde with a little red and a redish beard. Hers is red red. 

Found this adorable brunette couple and a baby card:


Gorgeous but they're not brunette.

So off to gimp:
So Gimp:
Use the lasso tool to select the area you want to recolor
Go to: Layer: Add new layer
Pick the color that you want to recolor it 
(I picked an bright orange/red for her hair)
Use the fill bucket
Go to the layer menu and select mode from "normal" to "overlay." 
Tada! Hers looks great. 
Merge layers.

His hair: trickier. 
I once again do the 
So Gimp:
Use the lasso tool to select the area you want to recolor
Go to: Layer: Add new layer
But here's where I have to change it up.
I add four new layers, all of the cutout of his hair.

The first layer I made very light blonde and picked "Lighten Only"
Then I combined the two.


The second layer I made a darker blonde
"overlay"
The third layer a light red "overlay"
The fourth layer a medium red "overlay."
Pick the color that you want to recolor it 
Merge them all.

You get this:


Not bad, but he has a beard.

I google beard drawings. 
I pick one:


I go to fotoflexer and use the "smart cutout" tool to leave ONLY the beard and no background.
I then "tint" the beard:
Tada! Now I layer it over the original picture and I erase off the extra edges and tilt it to fit.


Tada! I made an Aliya & Cody vintage card!


If you want to make the vintage cards you love look like the people you love feel free to use my techniques. And if you don't know what to do for something you can always ask me or google is your friend. And because Gimp and FotoFlexer are both free you can play around on them as long as you want until you get your desired result. 


Tuesday, August 6, 2013

Tangled in progress

So my Tangled cosplay is continuing to be a giant pain the neck. It's literally going to cause pain in my neck because my wig weighs 20 lbs.


That's what mine looks like at this point in time. It may be drastically changed before it's over and done with. I kind of don't like the way it's looking. And it has to have combs and fasteners secured in there because it can't stay on my head the way it is.


As far as the costume itself I have the dress (almost done). It needs her front dark purple panel, the outer design, and lace at the collar and hem. Then I just need to make the sleeves....

got the fabric and cut it in strips

pinned the pieces together

8 pieces pinned for each sleeve cap (the poof part). Now I just need to sew and stuff.