Showing posts with label hair. Show all posts

Monday, October 1, 2012

More Hair

Are you tired of hair posts yet?


I decided to go with the waterfall braid headband around to the side pony today:


And sad news, I had a really crappy day, and it constantly rained, so nobody even really saw it.

Tomorrow? Maybe. 


Know how to make me feel better? Subscribe! 

Sunday, September 30, 2012

A Change Would do you Good

So in honor of fall I decided to change it up! I decided to become a radiant redhead!

I showed my bestie some choice colors I liked:

http://pinterest.com/pin/141089400797475637/

http://pinterest.com/pin/141089400797467289/

http://pinterest.com/pin/141089400796183649/

And we went off to Sally's.


Using 3/4 Wella Red-Red 810/7R & 1/4 Wella Red-Blonde 728/8RG plus developer we began the process. The Wella is better for your hair because it's demi-perm and DOESN'T BURN YOUR SCALP! YAY!

This was about half dry


Full dry and direct sunlight. Parts of my hair wanted to stay blonde REALLY bad. Perhaps the color that had been used on me the time before did not take kindly to the red. But that pic is deceiving. The red sort of set in after 24 hours.


And here's what it looked like day 2. Carrot top, much?
And yes, I know, i'm taking a picture of myself in the bathroom at work. It's pathetic. Whatever. 


Day 4 hair. I did my (now commonplace) double braid headband and got a lot of compliments on both the hair style and color. 

The reddest parts are (of course) still the "virgin hair" or that which had never been dyed. And yes, some of the blondest parts still have blonde showing through, but it's got a good bit of dimension because of that. It doesn't look so...flat. 


So people with highlights be not afraid to dye your hair one color! The highlights from before will bleed through and still make you look fabulous! 

And if you already have a good golden blonde and want a red red, there's the secret formula for it. All you need is the two colors I said, developer, a brush, a bowl, and some saran wrap to wrap your head up with as soon as it's all slopped on there. 


Do not be afraid to do for yourself what the salon charges 8x as much for. For $25 I got professional dye and two new bottles of nail polish to make candy corn nails. Get a brush, reuse it, and get a friend. If you want highlights then section out your hair and use tin foil (that's what they use). If you just want a dye but want it to really hold get dye from Sally's (mix colors if you want. I did!), put it in a bowl or an applicator bottle, and apply it all over then wrap up in syran wrap for 40 minutes.

You will be amazed what you can do for yourself. You don't need a cosmetology degree to look great, especially when you're on a budget. Sure, it's nice to get pampered, but if you don't have the money but still want to look great I PROMISE YOU CAN DO IT YOURSELF.


Be beautiful even on a budget! And if you have questions, ask me!

Ribbons in Her Hair

Saw this adorble pin that had a waterfall braid that was tied off with a ribbon (and the ribbon was also the headband) for a side pony.

http://pinterest.com/pin/141089400796183770/

I decided to do my own variations on this:


My first try was actually just pinning the ribbon as a headband and then bowing it off at the top of the braid and braiding the remaining ribbon down. I was less than satisfied.

This way took 15 minutes and minimal effort.

Take 2 I waterfalled the back, tied the bow, and continued the braid down still integrating the ribbon.

This way took 20 minutes and medium effort (mostly because of the waterfall on the back of my head)

Take three I did the same maneuver, but I moved the bow down to the bottom of the braid.


Better views of the side and back


This took 35 minutes and medium / hard effort because I had to keep redoing the waterfall on the back of my head to make it look decent. I did not have a mirror behind and in front at this time, and it made it REALLY hard. 

Basically, if you'd like to braid a ribbon into your hair and have it as your headband, I think the bow looks better at the bottom. Or perhaps just try like the original pinner did...waterfall, bow, pony. However, I did like the way the blue looked in my braid.


BIG TIPS:
If you're going to use the same ribbon for braid and headband:
1. PIN IT IN!      You absolutely must bobby pin it to both sides of your head before you begin the waterfall braid or it will fall out.

2. Have access to a mirror in front and behind you.     I'm lucky to have a mirror front closet that is split doors so I can have a front and back mirror to do back of head braids. If you don't have this, it will be harder for you to accomplish.


3.  Have spare bobby pins!    There will be little whispies that insist on getting out of line. You need bobby pins to secure them back into place. Just twist as you work them into the braid, and they'll be almost seamless.


Happy Hairdos!

Sunday, September 16, 2012

Perfect Curls

So I am always on the lookout for how to make my hair perfectly curly like old hollywood glamour. I have a hair board on pinterest that is dedicated to such things. And pulling from that and my own experience, I'll show you how I get perfect curls.


This is a LENGTHY process. So if you're looking for the short version...try someone else. But..I have wavy hair naturally, mostly straight, fine, and difficult to keep curl BUT THIS WORKS.


"Perfect Curls"

So this is a combination of many different pins on my hair board. You can go look at all the tips on perfect curls or you can just listen to what I did.

My hair was a little dirty (24 hours since washing).
I put volumizing mouse in it.
Then I put it in hot rollers.


Hello hot rollers!
As I rolled each piece of hair I sprayed it with medium hold hair spray as it went into the roller.
I left the rollers in for an hour.
As I took each piece out I once again hairsprayed.
Then...I pincurled!

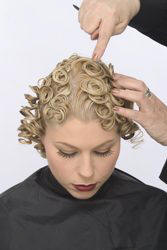
Basically a pincurl is just the curl that already came out of your hot roller, and you just twist it back up around your finger and bobby pin it to your head.

Full disclosure, this is neither my head nor my picture, but I wanted to show you a pincurl. And apparently I have no pictures of myself with them.


See how it's just a nice flat little spiral? This is also the best way to do your hair when wearing wigs because it keeps it flat against your head.

Alrighty. Well you just use a single bobby pin to pin it or you criss cross bobby pins for extra security. And then you go to sleep! (If you don't have time to sleep on them, then just leave them in at least half an hour and continue to follow the steps below. However, for best results, leave them in overnight)

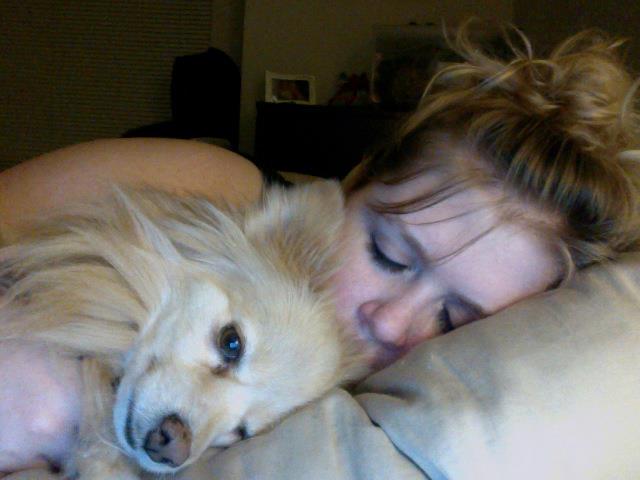
(no, my hair is not pincurled in this picture, but it should STILL BE while you sleep. This was just an excuse to put up a cute pic of my doggie and I snuggling)

Ok, wake up the next morning. Give it a quick all over spray with hairspray again. Take the bobby pins out.

Hi Crazy curly hair!

Ok, so I spray it AGAIN. I know, this seems like overkill, but for people like me whose hair won't stay curly...it's not. Then I turn my head over and run my hands through it and kinda give it a hand-toussle messy tease.

Now, for a Cosplay outfit (River Song from Doctor Who) I continue to tease it because hey! she has crazy curly hair!


BUT if I'm wearing it in real life I just hand tousle it like that, give it a final spray, and use a comb to tame any crazies sticking out. Below are varying degrees of tousling I did. The first instead of tousling I retouched the less curly spots with the curling iron. The second is a light tousle. The third is a full shake out and tousle with my hands.


And my hair will hold up the curl (losing some curl and just gaining body / wave per about every 10 hours) for up to 48 hours without washing it. Different hair will perform differently.

Saturday, September 15, 2012

Hair Today, Gone Tomorrow

So with all the cool hair things in Pinterest I thought "I can do that!" So I tried. Sweeping successes, and failures, hereto follow.


All of the following are from my "Hair" board:
http://pinterest.com/marlipaige/hair/


The Double Braid Headband
http://pinterest.com/pin/141089400796183796/
http://pinterest.com/pin/141089400796183786/


My hair is a lot thinner than the girls' in the picture so my braids are much smaller. However, they were really cute. It got a lot of compliments. And these are some of my favorite pics of myself. It took about 45 minutes to do it the first time. I've done it since and it takes me maybe 20 now. If you don't do the curls afterward like she does then it's really a breeze. You just have to get used to sectioning out your hair and then figuring out how to attach it without seeing the bands.

I bought tiny hairbands at Dollar Tree and used blonde bobby pins to secure it. I now have three different sizes of small hairbands that I alternate depending on how big my braid ends up being.


I use this size (a little smaller than a half dollar) for bigger braids or more secure ends: 

This size (a little smaller than a quarter) for small braids like the ones shown:

And these for completely invisible braids that are slightly more painful:


Bow Hair!
http://pinterest.com/pin/141089400796189841/

So this was fun and not something I could do myself. My dear friend, Aliya, did it for me. It was cute, but I wouldn't wear it in public. And I think I could do it myself now that I've been showed.


The Circlet

Inspired by other people's braid hair, I decided to start with the same principle as a french braid and wrap it all the way around my head. I did one from right to left that went over my head, and one from left to right that went under my head. It resulted in an updo of a full circlet.


 I added a small floral clip to hide the rubber band.


It took about 20 minutes to do. I wish I'd had a bit more hair so it would've gone all the way around. As it was I had about an inch of no braid.


"Fuller Ponytail"
http://pinterest.com/pin/141089400796827321/

The picture makes it look so easy anyone can do it and make it look good. WRONG. I did EXACTLY what I was supposed to, and...fail.


That doesn't look like a full ponytail! That just looks like someone doesn't know how to do their hair!
-_-


"Perfect Curls"

So this is a combination of many different pins on my hair board. You can go look at all the tips on perfect curls or you can just listen to what I did.

My hair was a little dirty (24 hours since washing).
I put volumizing mouse in it.
Then I put it in hot rollers.


Hello hot rollers!
As I rolled each piece of hair I sprayed it with medium hold hair spray as it went into the roller.
I left the rollers in for an hour.
As I took each piece out I once again hairsprayed.
Then...I pincurled!

Basically a pincurl is just the curl that already came out of your hot roller, and you just twist it back up around your finger and bobby pin it to your head.

Full disclosure, this is neither my head nor my picture, but I wanted to show you a pincurl. And apparently I have no pictures of myself with them.


See how it's just a nice flat little spiral? This is also the best way to do your hair when wearing wigs because it keeps it flat against your head.

Alrighty. Well you just use a single bobby pin to pin it or you criss cross bobby pins for extra security. And then you go to sleep!

(no, my hair is not pincurled in this picture, but it should STILL BE while you sleep. This was just an excuse to put up a cute pic of my doggie and I snuggling)

Ok, wake up the next morning. Give it a quick all over spray with hairspray again. Take the bobby pins out.

Hi Crazy curly hair!

Ok, so I spray it AGAIN. I know, this seems like overkill, but for people like me whose hair won't stay curly...it's not. Then I turn my head over and run my hands through it and kinda give it a hand-toussle messy tease.

Now, for a Cosplay outfit (River Song from Doctor Who) I continue to tease it because hey! she has crazy curly hair!


BUT if I'm wearing it in real life I just hand tousle it like that, give it a final spray, and use a comb to tame any crazies sticking out. Below are varying degrees of tousling I did. The first instead of tousling I retouched the less curly spots with the curling iron. The second is a light tousle. The third is a full shake out and tousle with my hands.


And my hair will hold up the curl (losing some curl and just gaining body / wave per about every 10 hours) for up to 48 hours without washing it. Different hair will perform differently.