Tuesday, July 30, 2013

Navy & Coral Crazy

Navy and Coral seem to be two big colors of the moment, and so to go along with my coral dress and navy cardigan I made a navy and coral eye makeup today.

Things I used:
Ulta brand blue eyeshadow palate

NYC neutral shadow palate (it's the "green eye" eye specific shadow palate)

CoverGirl three shade coral blush

Falsies "Big Eyes" Mascara
Black ELF liquid liner

Ulta Brush Set
& An Eyelash Curler (any will do)


Step by step in photos:
Put a neutral color all over the eye
Use straight edge brush for navy in crease
Use soft edge brush to spread darkest pink of blush over eyelid
Line top lid
Line half of bottom lid
Use medium pink on straight edge brush to seal liner 
(go lightly around the eyeliner. Try not to go OVER it, but just around it)
Use lightest pink in the inside corner of lid
Use top "big eyes" mascara brush on top lashes
Use bottom brush on bottom lashes
Go back over top lashes with bottom brush
Curl lashes

Just to show the difference & amazingness in this tiny mascara bottle. The two sized wands are AMAZING. Left eye - done. Right eye - done except no mascara. Look at what a difference it makes! This stuff is my new fave.


Nails


It's summer. And I'm having a hello kitty-gasm lately. So I decided to mix my favorite summer yummy with HK. Strawberry Nails and toes and a Hello Kitty accent thumb. 

Just paint the full nail a cute pinkey color. I used Sinful Colors Professional Island Coral. Then small black dots (Kiss nail art paint in black). And Milani Nail Art Green Sketch for the "leaves". 

Hello Kitty Accent Nail:
White - Revlon nail art dual tip expressionist. White on one end black on the other. 
Whiskers and eyes - Revlon nail art dual tip ( the black side)
Nose - Orly "Hook Up"
Bow - Revlon Nail Art Expressionist dual tip "Pinkasso"


And for bottom and top coat:
Sally Hansen dual duty top and base coat 


Tuesday, July 23, 2013

Cleaning Out, Making Food

So in an effort to have to move as little food as possible I'm trying to use up everything I can in my fridge, freezer, and pantry. So I decided to tackle two of the pinterest recipes that I had pinned forever ago with that in mind:

First...
http://pinterest.com/marlipaige/recipees/
That's my board for all things food.

Next, the actual recipes:
http://pinterest.com/pin/141089400796337077/
Crock Pot Pizza Casserole


Gonna be honest, I cheated. I didn't want to wait for a crock pot so I cooked my pasta, cooked down the meat some (but not all the way through), mixed together with onions and tomato sauce (I'm not a pepper or pepperoni person), and then I put all of them in little baking dishes and put mozarella on top. Then I just popped them in the oven while my cake (next recipe) was baking).


http://pinterest.com/pin/141089400799398750/
Berry Bubbles Cake

I used about 2 cups of frozen berries, 1 cake mix, and 1 bottle of the blackberry flavored "sparkling ice" because it's what I had here in my house. 
350 for 30 minutes just like a normal cake. And it was still liquidy. So I left it another 30 minutes....and....it still wasn't cooked all the way through. But it was mostly cooked just a little gooey in the middle, and since it had nothing like eggs in it I didn't mind. I actually sort of liked the gooey center. I melted some ice cream in there and just made it super gooey. It was marvelous. Reminded me a lot of my Nanan's "dump cake" that had pears and blueberries growing up. I really loved it.


So freaking busy!

So between trying to find a job, moving, writing for myself as well as blogs over at Biscuette.com and still for Lyrics Undercover, I am FREAKING BUSY!

In between packing I've started frequenting goodwill for new stuff for baby girl Johnson, who (I am still tickled pink) is a girl. Had someone tell me this week I really needed to be using Ebates for all of my online buying. So, I signed up, and it seems pretty cool. Unfortunately, I can't buy my ebay goodies through it, but for normal shopping, it's great.

While doing my constant Goodwill trips I found a serious gem! An almost complete set of "My Book House" children's anthology.
These are the "white and rainbow" 1971 version. I'm missing book 3, actually, but otherwise, I have the whole set. $1.50 per book, so $16.50 for the set, and as best I can tell they're worth between $70 and $150. So...THAT WAS A GOOD BUY!


Also started on my Dragoncon costume (assuming I get to go. If not, It'll be halloween). 
http://pinterest.com/marlipaige/costumes-sewing/
That's my link to the costumes that I'm working on, want to work on, find adorable, etc. But I've decided upon Rapunzel from Tangled. I love doing kid-inspired things because I just love how little kids want to take pictures with you. So...I decided to go the disney route. 
Got a wig, 150 cms, and then some extra "extensions" to try and make the braid big enough. Have a pink daisy chain, and I've got ebay offers in on lots of blooms to do the hair. 
The coloring may be different on my dress. I already have a dark purple corset I'm going to use for the corseted part...so the top and bottom will probably be reversed color scheme wise. I've been working on a light purple bottom, dark purple corset, and I'm going to get gold or tan cording for the lacing of the corset. Then I'll just need to make the poofy sleeves, lace around the collar, sheer sleeves, and lace at the end. I will update as I get it put together. 
I waited almost too long to get started on it, but I think I can pull it together pretty effectively in the next month.


In addition to all of that I still have to finish packing, move Sunday, and find a real job.


I also (can't help it) have been starting planning toward Aliya's baby shower. 
http://pinterest.com/marlipaige/showers/

That has not only her bridal shower stuff, but also the stuff for the baby shower. Her theme for the nursery is "Flower Fairies" so...there's a lot of that in there. 


So that's my life at the moment.


Wednesday, July 10, 2013

The Neverending T-Shirt Quilt

So I started this T-shirt quilt with such good intentions. I started pinning everything together when I realized....how the hell am I gonna sew this monstrosity?

So an fyi before you start yours that NOBODY tells you:
DO THEM IN ROWS!

Lay everything out on the floor that you want to use and arrange it accordingly then go in rows.
Let's say that these squares are all the different pieces of t-shirt that you've laid out exactly how you want. I know it's not even, neither is my blanket.

Next you need to make a general schematic of how you want your "rows" to be. Mine are still not 100% even, but they are in manageable rows!

Now only pin things together that are in the same "row". Then sew row by row.
When you're done you can then lay it back down, pin the sewed rows together, and sew again.

Nobody tells you to break that up when you're looking at doing one of these!
But if you don't you just end up with a lot of bulk to try and sew at one time and a plethora of straight pins sticking you in the thighs. It's not pretty. 

This is what it looks like thus far. It's still a work in progress. Only part of it is sewed. The other is just pinned:
It's gonna be freaking huge.


But yeah...rows...they're your friends. Take my word for it.


More soon!


Sunday, July 7, 2013

Updating Thrift Shop Goodies

So everyone loves a bargain. I love goodwill because it is great at that. However, sometimes your bargain buys aren't EXACTLY what you wanted. I found that to be true of my $3 lamp.

See? Just not pretty. Plain, bland, blah. 

I started with glittering the top screw:

Fill bowl with blue and purple glitter (it's what I had)

cover top in mod podge (that's what the little dobber in there was for)


and roll around in there. And you get this!


Prettyful!


Ok, step two: the lamp shade.

I had music note fabric that I loved and have been looking for a reason to use. 
It came from IKEA. You could buy it by the yard, and i got some remnant pieces for cheaper.

So I put a bead of hot glue along the rim of one side and pressed the fabric in.
Then I would continue on all four sides until they were secure.
Then glue excess on the insides of the top and bottom of the shade.


You can see how it's glued inside the top of the shade over the edge.


I layered the fabric different ways on different sides to create the desired effect.


And then I made an adorable little bow with a resin rose on it and glued that sucker on the front!
(I may or may not go back at some point and glue ribbon around it)


But for now. SO much cuter than it was! I no longer hate it, and I now have light.


Aunt Mar Mar

So fair warning, my bestie found out she's having a little girl today. So be prepared for the landslide of baby girl pins I might be trying in the near future. If you have a baby coming to you or someone you know and thought "hmm, wonder if that works" feel free to email me: marli@marlipaige.com and suggest pins for me to try out!
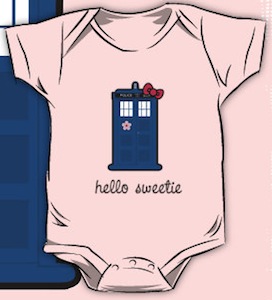
First off: I NEED THIS for her. It's $22 and I feel like I could make it for less than that. But I shall find a way to make something with this type logo on it. Tardis + Bow = Hello Sweetie the perfect meshing of doctor who and hello kitty. I mean, c'mon what can be better than that?


So, more to come! But seriously, suggest!


Friday, July 5, 2013

T-Shirt Quilt

Everyone and their mother has seen the adorable t-shirt quilts that everyone is making out of old ill-fitting (or just scratchy) t-shirts that you saved forever! I finally got my butt in gear and started putting mine together.


I cut up 11 shirts and 2 custom bags that were broken thus far. I'm still looking for about 5 or 6 more shirts.

I liked the t-shirt quilts that sort of had a more hodge podge look to them. I wasn't as much a fan of all the perfectly cut squares. So mine is NOT perfect.

I decided I wanted to start with my center square as the bag that was monogrammed with my puppy on it. It says "Bailey" and has his sweet little stitched picture on it.

So from there I just started placing things around it. I put my AOII letter shirt to the right, I <3 above="" act="" and="" below="" competition="" dr="" it.="" it="" left="" my="" nickname="" one="" p="" shirt="" the="" to="" who="">
Then I just kind of made areas that were for certain subjects. Sorority stuff went one way, theatre stuff another, nerdy stuff another. Then I mixed in my two band tees in and the APO bag my big brother made for me (because it was very broken). Now, I've got two prom shirts, several letter shirts, and a few more theatre shirts that I'm aware of still need to be added. But it's looking good so far!


Thursday, July 4, 2013

Perfect Vintage Curls

So a few months back I bought a groupon / living social deal for a Proliss curling wand. I studied up on the different sizes trying to figure out which would give me the curls I was looking for. I would link you to the tutorial I read if only I could locate it again....

Ok, so I got the 19mm curling wand because it was the "type" of curls that I wanted. They go on sale on deal sites from time to time. Mine was $30 plus $5 shipping. It's a $250 curling wand. And for what it does it would be worth every penny.


To prove to you that my hair is only slightly wavy when I wash it and/or wake up in the am:
Me with washed & brushed hair. It's got some natural body and wave, but it's not curly by any means. Also, I have on not one bit of makeup. Aren't I beautiful? lol


Step 1: 
Put part of your hair up

Step 2: 
Take a small chunk of hair and as far up as you can without burning your scalp....close to your head.

Step 3: 
Take that hair and twirl it all the way around the wand up to the top. You can hold the end. It's hot but not burning. Be careful not to burn your fingers.

(they do give you a glove so you don't burn it, but I didn't use that...)

Step 4:
When you let go it will come out as a small ringlet curl.

Step 5:
Spray that sucker! I love my big sexy hairspray. But you can use whatever your fave brand is.

Step 6:
Do all of the hair in the section you have down.

Step 7:
Let down new section(s) until you curl all of the hair. And don't forget to spray!


Step 8:
Turn that head over and shake it out!
(That's my fave step. Mess that hair up you just spent a ton of time making pretty!)


Step 9:
Isn't that pretty?
(And isn't it magical? I changed shirts!)


Step 10: 
Put on some makeup, and you are now BEAUTIFUL!
(And again with the costume changes! I put on a dress!)